|
This article refers to
few different models of Fender® Stratocaster®
tremolo bridge equipped guitars that
accepts the pop-in style tremolo arm. They are
all American production Strat's®, the Deluxe, Ultra, Elite and
Professional models. This article does
not refer to the 1983-1984 Dan Smith era Elite Strat®,
it uses a different style of tremolo bridge and pop-in arm
which is not affected by the same characteristics. Primarily
this article addresses characteristics found
within the tremolo arm attachment portion of a
specific tremolo
block as shown in the photographs below.
With these Strat's common model of tremolo block
there is a small slot which the tremolo arm
retaining clip installs into and often it
constrains the clips free movement while
installing or removing the tremolo arm which
causes a firmer installation and removal of
the tremolo arm You can clean up this
small slot in the tremolo block by using a flat
needle file of no more than 0.050" in thickness
which will allow the removal of excess paint
or metal material left behind from the machining
process. This clean-up will allow the small
tremolo arm retaining clip to expand in and out
smoothly within this slot when installing or
removing the tremolo arm. You will not be
altering the
slot or changing its dimensions, simply cleaning
it out and smoothing the upper and lower flat
surfaces so the clip will not scrape on the
sides and bind.
When your tremolo arm retaining
clip is removed inspect it to ensure it is not bent
or damaged which would also contribute to a
problematic installation or removal of your
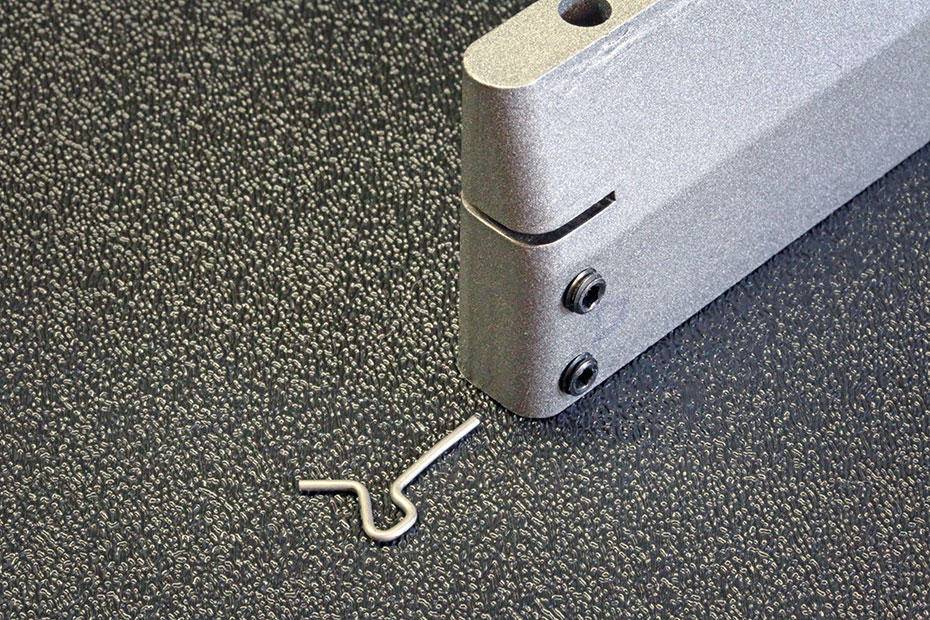
tremolo arm. The little retaining clip is
not manufactured out of a hardened spring steel, so it can get bent and distorted easier
causing issues. This is what your clip
should look like when new
003-6531-000
or if you need to order a replacement if yours
is damaged or missing.
Another issue we have found with the tremolo arm
retaining clip is that it is not installed all
the way into the block and this will cause
the tremolo arm to be difficult or firm to
install and remove. We have also seen
where these bridge assemblies have had their tremolo arm retaining clips
installed upside
down which causes a tremolo arm to not engage
the retaining clip at all. So be sure to review
the photograph below showing the correct
installation orientation of the tremolo arm
retaining clip.
To the best of our
knowledge,
Fender has never detailed what the two small
sets screws found on the back side of the
tremolo block are used for and a lot of people
don't even know they exist. These two set screws are used to adjust
the rotational friction of the tremolo arm.
These set screws accept a 3/32" hex wrench and
should only be adjusted with a tremolo arm
installed so you can get a tactile feel to the
adjustment changes. If your tremolo arm is
loose or sloppy then this is the fix you've been
looking for. To adjust these tremolo arm tension screws
it is best to
have the bridge out of the guitar with the
tremolo arm installed and snapped in place, then as
you rotate the tremolo arm you'll get a feel for its
rotational resistance (friction) and then gently
begin to tighten the upper-most set screw until you begin to notice the tremolo
arm gradually begin to rotate firmer.
Adjust the upper most set screw until you
achieve a tremolo arm rotation feel that you are
comfortable with. The lower-most set screw
that is closest to the tremolo arm retaining
clip will perform the same function and is really
kind of a redundant adjustment and is really not
needed to be adjusted additionally, but the
lower screw can also change how your tremolo arm
engages the tremolo arm retaining clip as well, so be mindful of any
changes to the lower set screw in how firm or
loose your tremolo arm pops into place. The upper set screw can
be also adjusted when the bridge is installed in
the guitar, simply install the tremolo arm until
it pops into place and
push down (dive bomb) on the tremolo arm to expose the set
screw on the back side of the bridge under the
top plate so you can insert the 3/32" hex wrench
to make an adjustment. If you do decide to
adjust it with the bridge installed be very
careful when the hex wrench is inserted into the
set screw that you
DO NOT
release the downward pressure on the tremolo arm
until you make the adjustment and have
REMOVED
the hex wrench, otherwise what will happen is
that with the hex wrench still inserted in the
set screw and you release the downward pressure
on the tremolo arm the wrench will come down and make
contact with your bodies painted surface and
surely damage the finish, so it is of the utmost
importance to always make the adjustment to the
upper set screw while holding down on the
tremolo arm, remove the wrench and only then
release the downward pressure of the tremolo
arm.
 Always
wear eye protective safety glasses when
performing any of the steps below! Always
wear eye protective safety glasses when
performing any of the steps below!

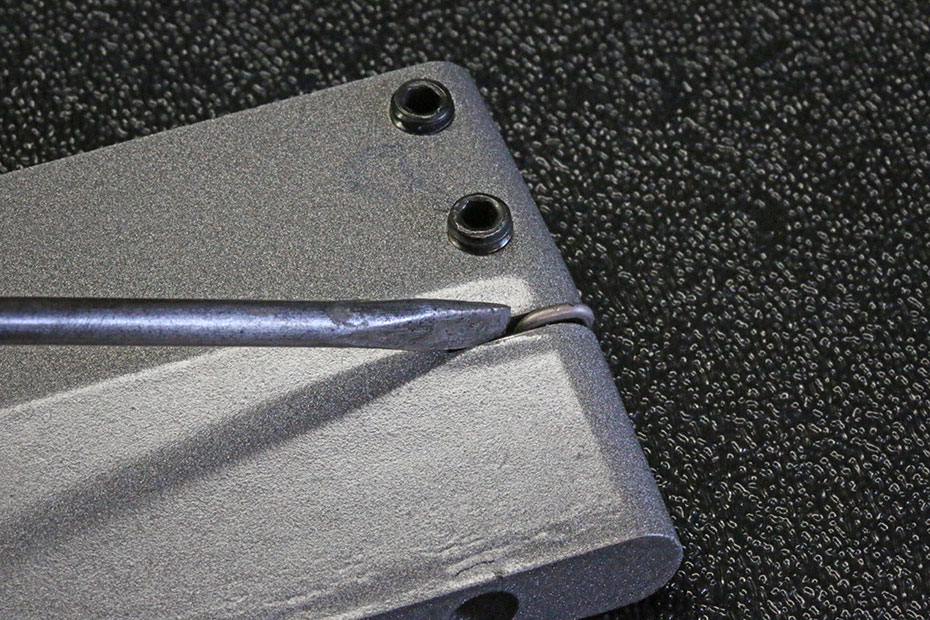
Above:
Depicting how to remove the
tremolo arm retaining clip. Use a small slotted
screwdriver or similar tool to gently tap out
this clip at the angle shown above. Gently
tap on the end of your tool with a lightweight
hammer to slowly slide out the tremolo arm
retaining clip toward the right as shown above.

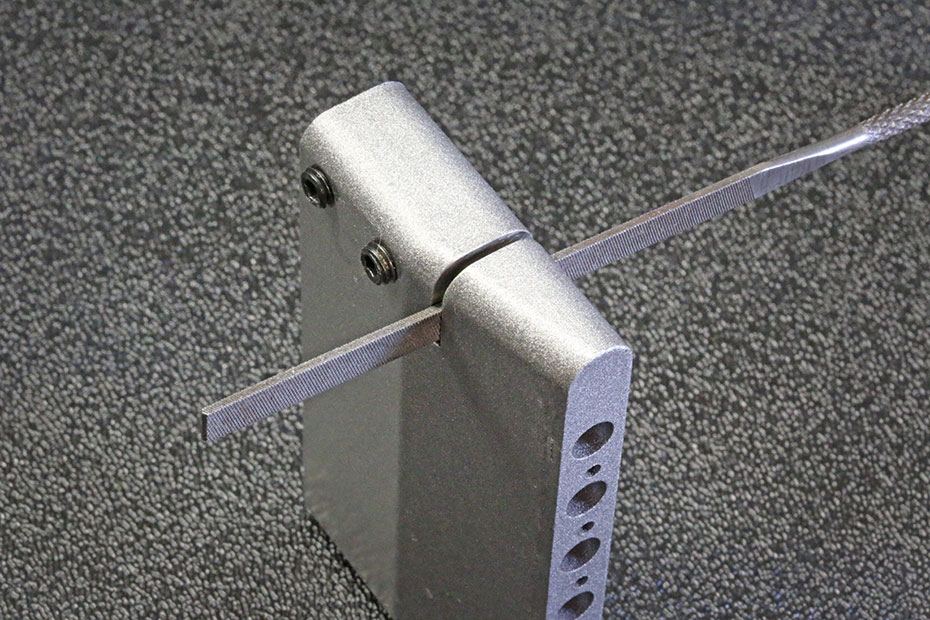
Above:
American Professional
Strat® tremolo block and the 0.050" thickness
flat needle file.
Inexpensive needle file sets can be acquired
from such outlets as
Harbor Freight Tools for around $3.00 a set and
they are decent quality for the light work
required of them.
The above tremolo block as shown is setup for
the American Professional Strat tremolo arm,
notice that it has the white tremolo arm
tensioning bushing. The only difference between
the American Professional Strat and the American
Deluxe Strat tremolo block assembly is the
plastic tremolo arm tensioning bushing. The
American Deluxe Strat's bushing has an inside
diameter of approximately 0.218" where as the
American Professional Strat's has an inside
diameter of approximately 0.188", this
difference is because each of these Strat's
accept a different diameter tremolo arm,
everything else about these tremolo blocks are
the same for the American Deluxe and the
American Professional Strat's. Typically
the bushing for the American Deluxe is black and
the American Professional is white, but Fender
may change materials for these bushings at any
time and colors may change.

Above:
The 0.050" thickness flat needle file inserted
into the tremolo arm retaining clip slot ready
for action. Simply apply pressure on the file
flat sides on the upper and lower flat surfaces
of the file to clean up this slot, then use
pressurized air to remove any debris you may
have removed.

Above:
Tremolo arm retaining clip
shown in the correct orientation prior to
installation in tremolo block. The longer
portion of the tremolo arm retaining clip, the
end pointing toward the tremolo block is
supposed to have a very slight bend in it, this
is what secures it in the small hole it gets
pressed into by providing a bit of friction.

Above:
Tremolo arm retaining clip
shown in the correct orientation as being
installed in tremolo block. The above shows the
clip just started in its installation, it still
needs to be pressed in further as shown below.
Installing this clip is not as easy as removal,
so be careful when installing this clip so as
not to bend or distort its shape.

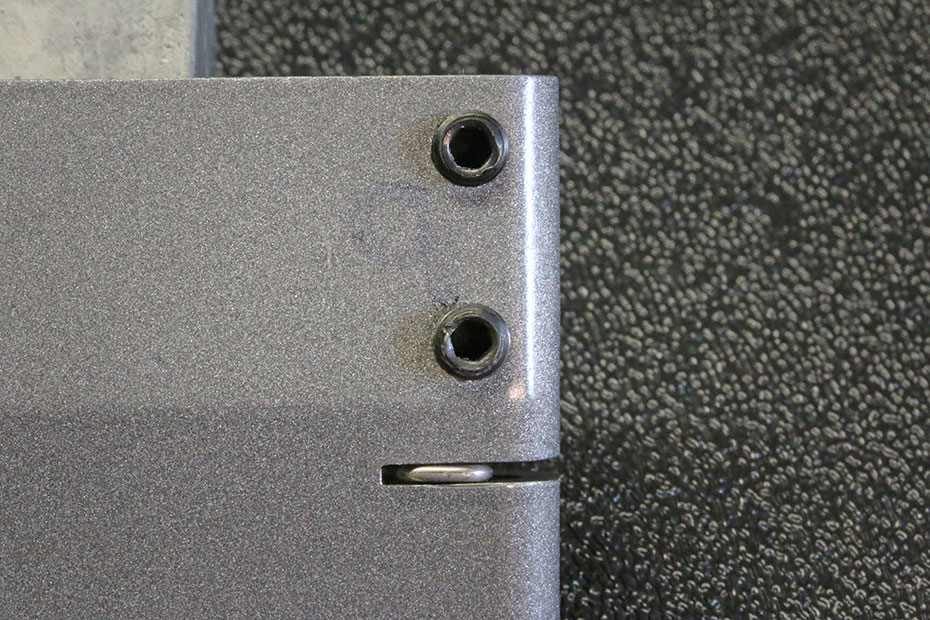
Above:
Tremolo arm retaining clip
shown installed all the way into the tremolo
block. If your clip is not installed all
the way as far as it can go to the left as in
the above photo it will cause a
difficult installation and removal of your
tremolo arm. |